
Unsharing data on Glo is a straightforward process that can be done quickly and efficiently. If you are looking for a way to stop sharing your data on Glo, you’ve come to the right place. By following a few simple steps, you can easily unshare your data and ensure that only you have access to it. Let’s dive into the details on how to unshare data on Glo and take control of your privacy and usage preferences.

How to Unshare Data on Glo: A Comprehensive Guide
Introduction
In this digital age, sharing data has become a common practice among mobile phone users. Whether it’s to help out a friend in need or to collaborate with a colleague, sharing data can be convenient. However, there are times when you might want to unshare data, especially if you need to secure your information or if you’ve shared it with the wrong person accidentally. If you’re a Glo subscriber and wondering how to unshare data on Glo, you’ve come to the right place! In this guide, we will walk you through the step-by-step process of unsharing data on the Glo network.
Why Unshare Data on Glo?
Before we delve into the details of how to unshare data on Glo, let’s first understand why you might need to do so. There could be various reasons for wanting to unshare data, such as:
Privacy Concerns
You may have shared data with someone temporarily but now want to revoke access to your resources to maintain your privacy.
Mistakenly Shared Data
It’s easy to accidentally share data with the wrong person due to a typo or misunderstanding. Unsharing data can help rectify such errors.
Data Security
If you suspect that your shared data might be misused or compromised, unsharing it promptly is essential to safeguard your information.
Steps to Unshare Data on Glo
Now that we’ve covered the reasons why unsharing data on Glo may be necessary, let’s move on to the practical steps you can follow to accomplish this task. The process is straightforward and can be done quickly through your Glo account.
Step 1: Log In to Your Glo Account
The first step to unshare data on Glo is to log in to your Glo account using your registered phone number and password. If you haven’t created an account yet, you can do so by visiting the official Glo website and following the registration process.
Step 2: Navigate to the Data Sharing Section
Once you are logged in to your Glo account, navigate to the data sharing section. This section is where you can manage all your shared data connections and permissions.
Step 3: Select the Shared Data Connection
In the data sharing section, you will see a list of all the data connections you have shared with other users. Identify the specific data connection that you want to unshare and select it.
Step 4: Click on the Unshare Option
After selecting the data connection you wish to unshare, look for the “Unshare” option, usually located next to the shared connection. Click on this option to initiate the unsharing process.
Step 5: Confirm Unsharing
A confirmation prompt will appear to ensure that you indeed want to unshare the selected data connection. Confirm your decision by clicking on “Yes” or a similar affirmative option.
Step 6: Verify Unsharing
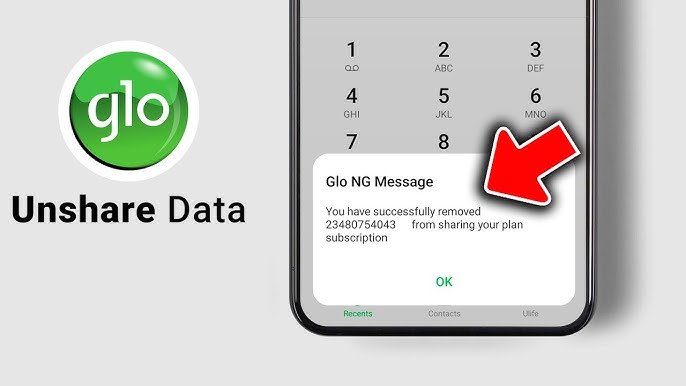
Once you have confirmed the unsharing action, double-check to see if the data connection has been successfully unshared. You may receive a notification confirming the completion of the unsharing process.
Additional Tips for Data Management on Glo
In addition to learning how to unshare data on Glo, here are some additional tips to help you better manage your data connections and usage on the Glo network:
Monitor Your Data Usage
Regularly monitor your data usage to avoid going over your plan limits. Glo provides tools and apps that allow you to track your data consumption easily.
Set Data Limits
Consider setting data limits on your device to prevent excessive data usage. This can help you avoid unexpected charges and optimize your data usage.
Secure Your Account
Ensure that your Glo account is secure by regularly updating your password and enabling two-factor authentication for added protection against unauthorized access.
Review Data Sharing Permissions
Periodically review the data connections you have shared with others and revoke access to any outdated or unnecessary connections to maintain control over your data.
In conclusion, knowing how to unshare data on Glo is essential for maintaining control over your shared resources and ensuring the security of your information. By following the simple steps outlined in this guide, you can easily unshare data connections on the Glo network and manage your data sharing permissions effectively. Remember to stay vigilant about your data usage and sharing practices to protect your privacy and data integrity. If you encounter any difficulties while unsharing data on Glo, don’t hesitate to reach out to Glo’s customer support for assistance. Stay informed, stay secure, and enjoy hassle-free data management on Glo!
How unshare your data to a Glo Number
Frequently Asked Questions
How can I stop sharing my data on Glo?
To unshare your data on Glo, you can dial *127*02# on your phone and follow the prompt on the screen. This will remove any data sharing arrangements you have set up.
Is there a way to cancel data sharing with specific numbers on Glo?
Yes, you can cancel data sharing with specific numbers by dialing *127*02*number# on your Glo line. Replace “number” with the actual phone number you want to stop sharing data with.
Can I disable data sharing completely on my Glo line?
Yes, you can disable data sharing completely by contacting Glo customer service or visiting a Glo service center. They will assist you in deactivating all data sharing settings associated with your phone number.
Final Thoughts
To unshare data on Glo, follow these steps: dial *127*02*recipient number# to deactivate data sharing instantly. Alternatively, dial *127*00# to remove all shared data recipients at once. Prioritize your data usage privacy by taking control of who has access to your shared data. Be proactive in managing your data sharing settings to ensure your privacy and security.